.svg)

A well-designed master bedroom suite delivers three things without compromise: a clear spatial plan that separates sleeping, dressing, and wellness zones; layered lighting that shifts from bright and functional to warm and cocooned; and a small set of premium, locally sourced materials that age beautifully in Swiss conditions. Get those three right, and everything else falls into place.
Your three immediate actions:
- Measure the room completely (floor area, ceiling height, window positions, door swings, and HVAC register locations).
- Decide your layout type: compact en-suite, suite with walk-in closet, or expansive suite with a lounge or terrace zone.
- Choose two primary materials — one for floors and joinery, one for the bathroom and accent surfaces — and commit to them before you buy anything.
Quick site-visit checklist:
- Overall room dimensions (length × width × ceiling height)
- Window sizes, sill heights, and cardinal orientation
- Primary view axis and any privacy concerns
- Door swing directions and existing service locations (plumbing, electrical, HVAC)
- Natural light quality at morning, midday, and evening
When the project involves structural changes or you want a full 3D visualization before committing to a layout, Upscale Interiors offers turnkey design packages built specifically for Swiss residential projects.
Pro Tip: Photograph every wall, corner, and service point before your first designer meeting. A five-minute phone walkthrough saves hours of back-and-forth later.
What design principles make a master suite actually work?
Every great master suite starts with intentional zoning. Think of the room as three distinct areas: the sleep zone (bed, bedside tables, blackout treatments), the dressing zone (walk-in closet or fitted wardrobes), and the wellness zone (en-suite bathroom). Clear separation between these areas improves privacy, reduces noise transfer, and makes the suite feel purposeful rather than just large.
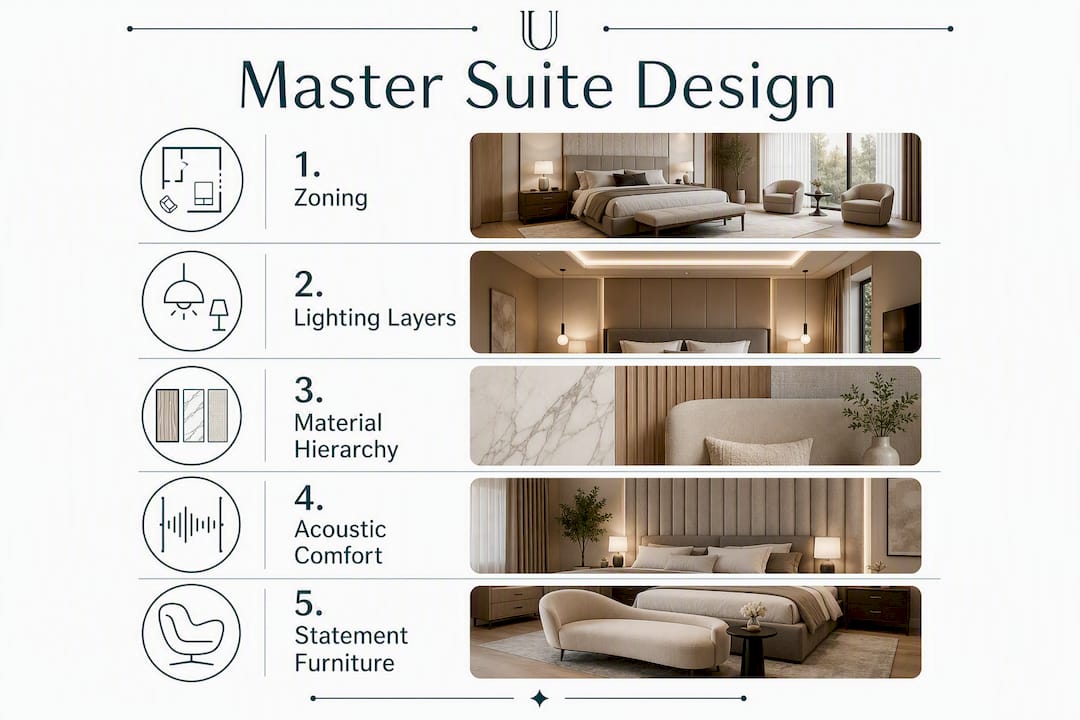
Lighting is where most homeowners underinvest. A three-layer approach — ambient, task, and accent — gives you full control over the room’s mood at any hour. Ambient lighting (recessed downlights or a central pendant) handles general illumination. Task lighting (adjustable wall sconces or bedside reading lights) serves functional needs. Accent lighting (LED strips behind a headboard, a lit display niche) adds depth and warmth. A base color temperature of around 3000K suits the sleeping zone well; warmer accents at 2700K create that cozy, hotel-like glow that luxury interiors consistently rely on.
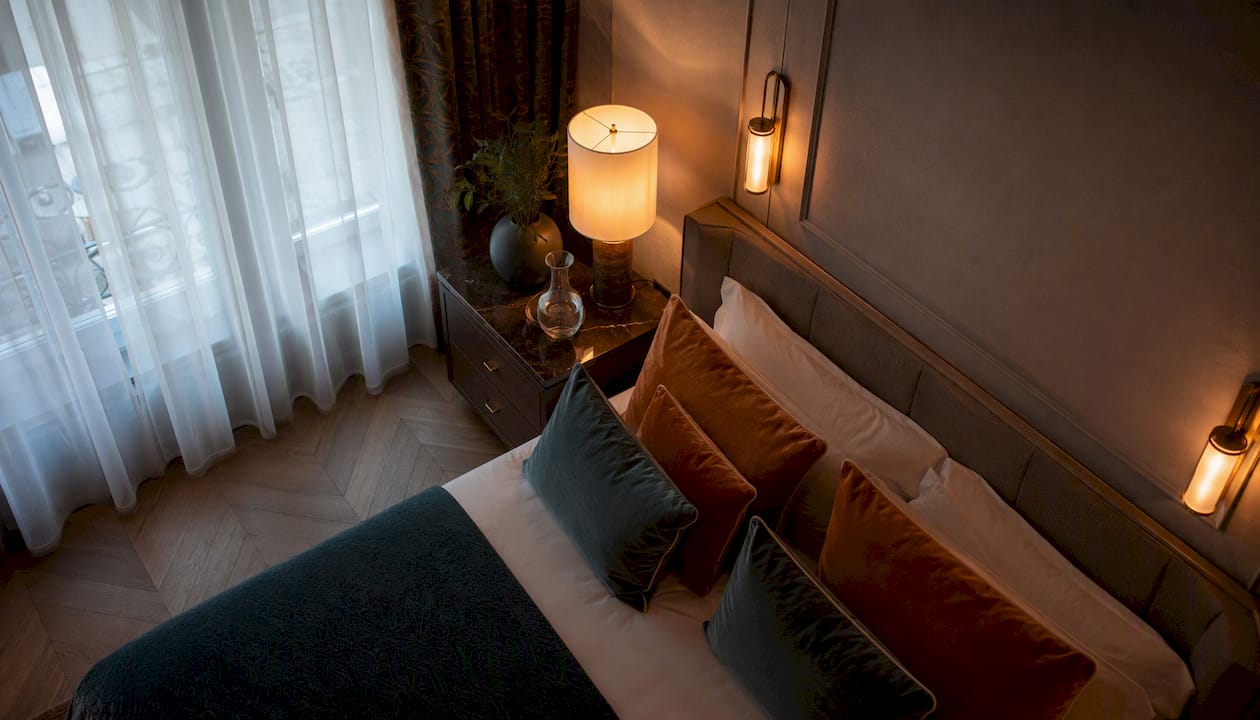
Material hierarchy matters more than most people realize. Limit yourself to two or three noble materials and use them consistently throughout the suite. In Swiss alpine contexts, that often means Swiss stone pine for bedroom joinery and bed frames, Bündner quartzite for bathroom surfaces and fireplace surrounds, and FSC-certified oak for flooring. These materials perform well in alpine humidity cycles, source locally, and carry genuine resale appeal in the Swiss market.
Acoustic and thermal comfort are non-negotiable in Switzerland’s climate. Underfloor heating beneath stone or engineered wood floors eliminates cold-morning discomfort and frees up wall space from radiators. For acoustic control, dense insulation between floor layers and around the en-suite plumbing wall prevents noise transfer. In alpine chalets, this is considered a baseline quality standard, not a luxury upgrade.
Pro Tip: Commit to one statement furniture material — say, oiled Swiss stone pine for the bed and wardrobes — and keep accessories to a maximum of three textures. Visual noise is the fastest way to make a premium suite feel ordinary.
What layout options work best for a master suite?
Layout choice depends on your floor area and how you use the suite. Here are four common configurations, each with realistic dimensions and circulation guidance.
Compact en-suite (25–35 m² total): The bedroom occupies roughly 4.0 × 4.5 m, with a 1.8 × 2.4 m shower-only en-suite accessed directly from the sleeping zone. Bedside clearances of 60–80 cm on each side of a king bed are the minimum; 90 cm feels generous. A built-in wardrobe runs along one wall, keeping the dressing function contained without a separate room.
Suite with walk-in closet (40–55 m² total): The bedroom stays at approximately 4.5 × 5.0 m. A dedicated dressing room of 2.5 × 3.0 m sits between the sleeping zone and the en-suite, acting as an acoustic buffer. This layout is particularly effective in Zürich apartments where the en-suite is on an interior wall and the bedroom faces the view.
Suite with separate lounge or terrace zone (60–80 m²+): Common in alpine chalets and larger Zürich villas. A partial partition — sandblasted glass or a sliding solid-wood panel — separates a seating area or reading nook from the sleep zone while preserving daylight and sightlines to the view. The en-suite can expand to include a freestanding tub.
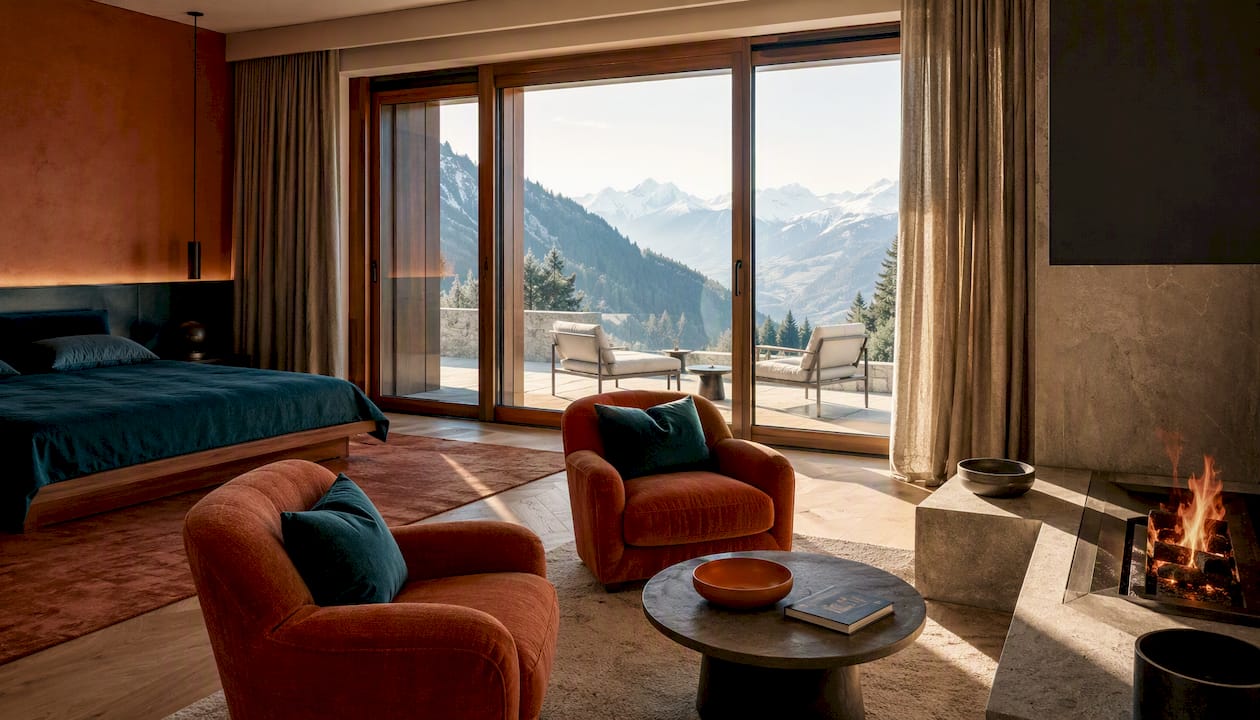
Open-plan with partial partitions (35–50 m²): A single large room uses a custom headboard structure or a low joinery unit to define the sleep zone without closing it off. This works well when the primary view is the room’s main asset and you don’t want walls interrupting it.
Recommended clearances at a glance
The visual axis from the bed to the primary window or view is your most important design line. Every other element — the TV position, the closet door swing, the bathroom entry — should be arranged so it doesn’t interrupt that axis.
Pro Tip: Sketch your layout on graph paper at 1:50 scale before committing to anything. A king bed (180 × 200 cm) plus two 60 cm bedside tables takes up 3.0 m of wall length alone. That reality check prevents a lot of expensive surprises.
How should you plan the en-suite and walk-in closet?
The relationship between the en-suite, closet, and sleeping zone defines how the suite actually feels to live in. Two adjacency strategies dominate Swiss residential projects.
Strategy 1: En-suite directly off the sleeping zone. Fast and convenient, but it means plumbing noise can disturb a sleeping partner. Mitigate this with a solid-core door, acoustic insulation on the shared wall, and a mechanical ventilation system that runs quietly.
Strategy 2: En-suite separated by the dressing area. The walk-in closet acts as a buffer zone, absorbing sound and creating a morning ritual sequence (bed → dressing → bathroom) that feels genuinely hotel-like. This layout requires more floor area but pays off in daily comfort.
For the en-suite itself, here are the key sizing benchmarks:
- Shower stall: minimum 90 × 90 cm; 120 × 120 cm is the comfortable standard for a premium suite.
- Double vanity: 120–150 cm wide with 55 cm depth; allow 60 cm of standing space in front.
- Freestanding tub: typically 170 × 75 cm; needs 60 cm clearance on all accessible sides.
- Mechanical ventilation: required in Swiss building practice for windowless bathrooms; aim for 60–80 m³/h extraction.
- Heated floors: a 150–200 W/m² electric mat under stone or large-format tile is standard for alpine properties.
Walk-in closet planning follows a simple rule: double-hang sections (shirts + jackets) need 100 cm of vertical clearance per rail; full-length hanging needs 170 cm. Shelf depth for folded items is 40–45 cm. A central island with drawers adds storage and a surface for accessories. Lighting inside the closet should be bright and neutral (3500–4000K) so colors read accurately.
Privacy checklist for the en-suite:
- Solid-core or acoustic door between bedroom and bathroom
- Opaque or sandblasted glazing for any internal windows or sidelights
- Concealed plumbing chases to reduce pipe noise
- Separate light switch accessible from both inside and outside the bathroom
Pro Tip: If your floor plan allows it, place the walk-in closet on the north or interior wall and give the en-suite a small operable window or skylight. Natural light in a bathroom makes a measurable difference to how luxurious the space feels.
How do you plan layered lighting for a hotel-caliber feel?
Lighting is the single detail that separates a well-decorated bedroom from a suite that genuinely feels like a five-star hotel. The three-layer model is your framework, but the execution is in the specifics.
Fixture and spec reference
Smart scene control — a single bedside panel or a phone app — lets you move from “morning routine” (full ambient + vanity) to “reading” (bedside sconces only) to “sleep” (accent strip at 10% warmth) without getting out of bed. Philips Hue and similar systems integrate cleanly with Swiss-standard electrical installations.
Coordinate with your electrician before walls are closed. Embedding conduit for future smart home upgrades costs almost nothing at the rough-in stage and avoids expensive retrofitting later. The same principle applies to USB-C and power outlets at bedside height: plan for two duplex outlets per side, plus a low-voltage USB port.
Pro Tip: Ask your electrician to run a dedicated circuit for the bedroom lighting and a separate one for the en-suite. It gives you independent scene control and makes future smart home integration straightforward.
Which materials and finishes work best in a Swiss master suite?
The Swiss alpine environment is demanding: humidity swings between dry winter heating and damp spring thaws, UV exposure at altitude is intense, and resale buyers in markets like Zürich and Gstaad scrutinize material quality closely. Your palette needs to perform as well as it looks.
Primary material recommendations:
- Swiss stone pine (Arve): Naturally antimicrobial, aromatic, and dimensionally stable. Use it for bed frames, wardrobes, and ceiling paneling. Installation costs typically run CHF 350–600/m² depending on profile and finish.
- Bündner quartzite: A regional stone with exceptional hardness and a warm, striated appearance. Ideal for bathroom floors, shower walls, and fireplace surrounds. Costs typically run CHF 220–380/m² installed.
- FSC-certified oak: Versatile, widely available from Swiss and European mills, and compatible with underfloor heating. Use it for engineered plank flooring and select furniture pieces. Floor coverings generally run CHF 100–200/m² installed.
Finish choices affect both maintenance and atmosphere. Matte stone surfaces hide water marks and fingerprints better than polished ones — a practical advantage in a daily-use bathroom. Oiled wood develops a patina over time and is easy to spot-repair; lacquered wood looks crisper initially but shows scratches more visibly and requires full refinishing when damaged.
Sustainability matters beyond ethics in Switzerland. FSC certification and locally sourced stone and timber carry genuine weight with Swiss buyers and appraisers. Reclaimed Saanenland wood, when available, adds provenance and character that no imported material can replicate.
Sustainability note: Choosing FSC-certified timber and regionally quarried stone reduces transport emissions, supports local trades, and typically shortens lead times by several weeks compared to imported alternatives — a real advantage when managing a Swiss renovation timeline.
Pairing two woods (say, Swiss stone pine for joinery and oak for floors) works well when you differentiate them by finish: oiled pine versus wire-brushed oak creates enough contrast to read as intentional rather than mismatched. A stone-plus-wood pairing (quartzite bathroom, oak bedroom) is the most common approach in high-end Swiss suites and rarely goes wrong.
What furniture and storage rules keep a suite calm and functional?
The goal is a suite that reads as calm and purposeful, not a showroom. That means every piece earns its place, and storage is invisible until you need it.
Furniture sizing reference
Built-in joinery almost always wins over freestanding furniture in a master suite. Custom wardrobes use the full floor-to-ceiling height, eliminate the dust-collecting gap above a freestanding piece, and can integrate lighting, pull-out valet rods, and laundry sorting drawers invisibly. The trade-off is cost and lead time — expect 8–12 weeks for custom Swiss joinery — but the result is a suite that looks finished rather than furnished.
Smart built-in features worth specifying:
- Integrated LED strip lighting inside wardrobe interiors (activates when doors open)
- Hidden cable management channels behind bedside tables
- Pull-out valet rod for next-day outfit staging
- Deep bottom drawer for laundry sorting, keeping the closet floor clear
For TV placement, the rule is simple: the screen should not be visible from the bed unless you actively want it there. A recessed niche with a pocket door or a lift mechanism keeps the sleep zone visually clean. If the TV is wall-mounted, position it so the center of the screen sits at eye level when you’re seated upright in bed, roughly 100–110 cm from the floor.
When custom joinery is required, Upscale Interiors offers customized furniture and full 3D visualization so you can see exactly how built-ins will look before a single panel is cut.
How do you balance panoramic views with privacy and light control?
This is the central tension in most Swiss master suite projects, especially in Zürich lakefront apartments and alpine chalets where the view is the room’s greatest asset. The answer is layering.
Treatment options compared:
- Blackout curtains: The most effective light-blocking solution. Heavy linen or velvet in floor-to-ceiling panels on ceiling-mounted tracks give a hotel-like fall and excellent acoustic absorption. Best for east and west exposures where morning or afternoon sun is intense.
- Motorized roller blinds: Clean, minimal, and easy to automate. Pair a blackout roller with a sheer day blind on the same bracket for full flexibility. Suitable for south-facing glazing where solar control matters year-round.
- Sandblasted or interlayered glazing: A permanent privacy solution for lower sections of large windows or internal glazing between the bedroom and dressing area. Maintains daylight while obscuring sightlines from outside.
- Sliding wood partitions: The most architecturally satisfying option for alpine suites. A solid-wood sliding panel can close off a terrace-facing glazed wall at night while disappearing into a wall pocket during the day. Glass interior doors and sliding panels can be combined to manage both privacy and openness elegantly.
For Swiss solar control, south-facing windows need external shading (a motorized awning or a projecting roof overhang) in addition to interior treatments. East-facing windows benefit most from blackout solutions because morning sun arrives low and intense. West exposures need UV-filtering glazing to protect textiles and wood finishes from fading.
Pro Tip: Program two scenes into your motorized blinds: a “morning wake” scene that raises the sheers gradually over 20 minutes, and a “full dark” scene for sleep. It costs nothing extra if you’re already automating, and it genuinely changes how you experience the room.
Acoustic privacy for street-facing or terrace-adjacent suites benefits from secondary glazing (an inner pane added to existing windows), heavy curtains, and acoustic seals at door thresholds. In Zürich’s denser neighborhoods, this combination can reduce perceived exterior noise significantly.
How do ceiling height and architectural features change the feel of a suite?
Ceiling height sets the emotional register of the room before a single piece of furniture arrives. A ceiling below 2.5 m feels compressed in a large suite; above 3.0 m, the room starts to feel genuinely grand.
Ceiling treatment options:
- Exposed timber beams: The defining feature of Swiss chalet suites. Original beams should be preserved and cleaned rather than painted; new beams can be added in Swiss stone pine or larch to reinforce the alpine character. They work best when the ceiling height is at least 2.8 m so the beams don’t feel oppressive.
- Recessed cove lighting: A plaster or drywall cove around the room perimeter conceals LED strips that wash the ceiling with indirect light. This technique adds perceived height and warmth simultaneously.
- Coffered ceiling: Adds formality and proportion to a large, flat ceiling. Works well in Zürich period apartments where the room proportions are generous but the ceiling is plain.
- Floating bulkhead: A lowered section over the bed zone creates intimacy within a high-ceilinged room, framing the sleeping area without closing it off.
Integrating services into ceiling details requires planning. Concealed HVAC supply and return grilles should be positioned away from the bed axis so air movement doesn’t disturb sleep. Underfloor heating eliminates ceiling-level heating requirements entirely, freeing the ceiling plane for purely architectural decisions.
What does a master suite renovation cost in Switzerland, and when should you hire a designer?
Swiss renovation costs vary significantly by scope. Here’s a realistic overview based on current market data.
Cost bands for master suite work
Swiss renovation guidance recommends budgeting a 10% reserve for unforeseen costs — a figure that experienced Swiss contractors consistently validate. Bathroom renovations typically range in cost depending on finish quality, with mid-range and luxurious options varying significantly.
Project timeline
When to hire a designer vs. an architect:
- Hire a licensed architect or structural engineer when the project involves load-bearing changes, heated-space conversions, or exterior alterations.
- Hire Upscale Interiors for full-suite turnkey delivery, 3D visualization packages, material sourcing, and project management when the structure is sound.
Permit considerations: Converting adjoining rooms into heated living space or altering load-bearing elements generally requires a building permit in Switzerland. Heritage zones in resort towns like Gstaad or Zermatt have stricter rules on facade and window changes. Always check with your Gemeinde before starting work, and notify your condominium association (Stockwerkeigentümergemeinschaft) before any structural or service modifications.
For budgeting guidance tailored to Swiss projects, Upscale Interiors’ bespoke design budget guide walks through how to allocate spend across design, materials, and trades.
How do you prepare for your first designer meeting?
A well-prepared brief saves you money and gets better results. Here’s a process you can follow this weekend.
Step-by-step measurement template:
- Measure overall room length, width, and ceiling height (measure height in at least three spots — Swiss floors are rarely perfectly level).
- Record every window: width, height, sill height from floor, and which direction it faces.
- Note all door positions and which way they swing (inside or outside the room).
- Mark HVAC registers, radiators, and any existing underfloor heating zones.
- Photograph every wall from corner to corner, plus the view from the bed position.
One-page brief template:
- Occupancy: Who uses the suite and how (couple, single, occasional guests)?
- Primary uses: Sleep only, work from bed, morning yoga, dressing ritual?
- Must-have features: Walk-in closet, freestanding tub, fireplace, terrace access?
- Style references: Three images that capture the feeling you want.
- Budget range: Cosmetic, mid-range, or full reconfiguration (use the bands above).
- Timeline: Target completion date and any fixed constraints (school holidays, rental periods).
Initial priorities checklist:
- Preserve the primary view axis from the bed
- Protect privacy from neighboring buildings or terraces
- Maximize storage without cluttering the visual field
- Plan for layered lighting from the start (not as an afterthought)
- Confirm HVAC and underfloor heating compatibility before finalizing the floor finish
Bring your measurements, photographs, a rough floor plan (even hand-drawn), and your style references to the first meeting. A designer who can see the actual space and understand your priorities will give you far more useful advice than one working from a verbal description alone.
How Upscale Interiors approaches master suite projects differently
The difference between a good master suite and one that genuinely stops you in your tracks usually comes down to process. At Upscale Interiors, every project starts with a detailed brief and site survey, moves into a 3D visualization phase, and only then proceeds to material selection and procurement. That sequence matters because 3D visualization lets clients make confident layout and material decisions before anything is ordered or built — reducing change orders and the costly surprises that derail Swiss renovation timelines.
Local sourcing is a genuine advantage. Upscale Interiors maintains working relationships with regional millworkers and suppliers of Swiss stone pine and Bündner quartzite, which shortens lead times and ensures material consistency across a project. When a client in Zürich specifies Swiss stone pine joinery, the team can source, specify, and coordinate delivery in a way that a designer working from a catalog simply cannot match.
What the process looks like in practice:
- Brief and site survey → concept development and 3D floor plans
- Material board with physical samples from local suppliers
- Fixed-price or phased contract with clear milestones
- Procurement coordination across joinery, stone, fixtures, and furniture
- On-site supervision through construction and commissioning
The Modern Glam project in Lucerne is a good example of how sculptural furnishings and a restrained palette come together in a Swiss residential context — the kind of outcome that’s hard to achieve without both design expertise and reliable local trades.
Pro Tip: Ask for a fixed-price design package for the concept and 3D phase before committing to full project management. It gives you a clear deliverable, a realistic cost picture, and the confidence to proceed — or pause — without financial risk.
Key Takeaways
A successful master bedroom suite in Switzerland combines clear spatial zoning, a disciplined material palette of two or three locally sourced materials, and layered lighting planned from the structural phase — not added as an afterthought.
Why the “just add luxury finishes” approach misses the point
Most homeowners approach a master suite renovation by upgrading finishes — better stone, nicer hardware, a statement light fixture. Those choices matter, but they’re the last 20% of what makes a suite feel genuinely special. The first 80% is spatial: where the zones sit relative to each other, how the light enters and can be controlled, and whether the acoustic separation between the bathroom and the sleeping area is good enough that one partner can shower at 6 AM without waking the other.
The suites that consistently impress — whether in a Zürich penthouse or a Gstaad chalet — share one quality: restraint. A custom-milled headboard in Swiss stone pine, a single slab of Bündner quartzite behind the vanity, and blackout curtains that fall perfectly to the floor will outperform a room full of expensive but uncoordinated pieces every time. The psychological impact of a calm, intentional space is real and measurable in how you sleep, how you start your mornings, and how guests respond when they walk in.
The Swiss market adds one more layer of complexity: permits, condo association notifications, and local material lead times can derail even a well-funded project if they’re not anticipated. The homeowners who navigate this smoothly are the ones who start with a thorough brief, engage the right professionals early, and treat the design phase as an investment rather than a cost to minimize.
Upscale Interiors in Zürich: your next step toward a suite that feels like a retreat
Upscale Interiors gives Zürich homeowners something most design services don’t: a complete, fixed-scope path from blank floor plan to finished suite, with 3D visualizations that make every material and layout decision feel certain before construction begins. You see your suite in photorealistic detail, choose your Swiss stone pine joinery and Bündner quartzite surfaces from physical samples, and hand off procurement and site coordination to a team that already knows the local trades.
The practical difference: no chasing contractors, no material surprises, and no permit blind spots. Upscale Interiors manages the full sequence — brief, 3D design package, material sourcing, construction coordination, and final styling — under one contract with clear milestones.
Ready to see what your suite could look like? Book a consultation call and bring your measurements, photos, and a rough sense of your budget. The team will take it from there.
Useful sources and local references
- Switzerland Sotheby’s International Realty — renovation guidance: Practical advice on Swiss renovation permits, cost reserves, and when to involve authorities. Includes real cost examples for bathroom and window renewal.
- Wood Doctor — Saanen-Gstaad chalet renovation guide: Material cost ranges for Swiss stone pine, Bündner quartzite, and reclaimed Saanenland wood; useful for budgeting alpine suite projects.
- Thomas Crauwels — master suite in a chalet: Practitioner-level detail on panoramic glazing, privacy strategies, and partial partitions in Swiss alpine contexts.
- Offerten Schweiz — renovation cost guide: Swiss bathroom and flooring cost benchmarks by finish level; useful for mid-range and luxury budget planning.
- Upscale Interiors — interior design services: Full overview of Upscale Interiors’ design packages, from online consultation to full project management.
- Upscale Interiors — 3D design service: Details on how 3D visualization works and what clients receive at each project stage.
- Upscale Interiors — bespoke budget guide for Switzerland: Step-by-step guidance on allocating a design and renovation budget across trades, materials, and professional fees in Switzerland.
This article provides general design and planning information. For permit requirements, structural assessments, and legal obligations specific to your property, consult your local Gemeinde, a licensed Swiss architect, or a qualified legal professional.
Recommended
- Luxuriöse Wohnzimmer-Designideen für anspruchsvolle Zuhause | Upscale Interiors
- Luxury Living Room Design Ideas for Sophisticated Homes | Upscale Interiors
- Interior Design Zurich | Swiss Interior Designers – Upscale