.svg)

The fastest reliable route to a bespoke kitchen island is working with a specialist interior design firm that combines in-home measurement, 3D visualization, and full project management under one roof, rather than piecing together a designer, joiner, and installer yourself. Upscale Interiors handles exactly this process for Zürich clients, from the first sketch to the final fitted drawer.
Your immediate next step is simple: book a consultation, whether in person at a showroom or through a virtual walkthrough, and bring a short brief with rough measurements. You don’t need finished plans. You need a starting point.
Before that first meeting, gather:
- Rough kitchen measurements (length, width, ceiling height, window and door positions)
- A wish list of must-haves (seating, storage, appliance placement)
- A realistic budget range, even a broad one
Pro Tip: Take three or four phone photos of your current kitchen from different angles before the consultation. Designers read a room faster from a photo than from a verbal description, and it saves you twenty minutes of explaining what you mean by “the awkward corner.”
Key Takeaways
A bespoke kitchen island delivers lasting value only when workflow planning, material selection, and trade coordination happen together under one accountable team.
Why Choose a Made-to-Measure Kitchen Island
An off-the-shelf island gets you a shape. A made-to-measure island gets you a workflow. When a designer plans around how you actually cook, entertain, and store things, drawers land exactly where your hands expect them, and dead corners disappear.
Custom builds also pay off in materials. You choose worktops and cabinetry rated for how hard you’ll use them, not whatever a catalog happened to stock that season. That matters over a fifteen or twenty year lifespan, not just at handover.
- Tailored storage that matches your actual cookware, not a generic template
- Appliances, ventilation, and structural support planned together, not retrofitted
- Higher resale and lifestyle value in open-plan homes where the island is the social hub
Pro Tip: If you host often, ask your designer to model seating for six, not four. Most homeowners underestimate how much island perimeter a real dinner party needs.
What Does the Custom Island Design Process Look Like?
A bespoke kitchen renovation moves through five distinct stages, and knowing them upfront helps you set realistic expectations for how long each one takes.
- Briefing and site survey. Upscale Interiors measures the space, checks ceiling heights, and notes plumbing and electrical points already in the room.
- Concept and layout options. You’ll see sketches comparing a full island against a peninsula, since a peninsula often suits narrower kitchens better without losing the social function.
- 3D visualization and material sampling. Photoreal renders let you compare a stone worktop against a lacquered finish before anything is manufactured, a step that multi-stage kitchen planning approaches consistently rely on to reduce late-stage changes.
- Technical drawings and trade coordination. Electricians, plumbers, and ventilation specialists work from the same drawing set, avoiding the classic problem of a socket landing behind a cabinet door.
- Production, installation, and aftercare. The team that built your cabinetry typically installs it, which shortens the handover timeline considerably compared to separate suppliers.
One detail worth flagging early: a widely used practical guideline calls for a practical amount of clearance around the island around an island, enough for doors and drawers to open fully while two people pass without turning sideways. Get this wrong at the sketch stage and you’ll feel it every single day afterward.
Which Materials and Finishes Work Best for an Island?

Your worktop choice affects daily maintenance more than almost any other decision in the kitchen. Natural stone brings warmth and unmatched character, but it needs periodic sealing and can mark from acidic spills. Quartz resists staining and scratching with almost no upkeep, a practical edge in a household kitchen used daily. Ceramic worktops handle heat exceptionally well and shrug off scratches, though they carry a higher price point and require careful handling during fabrication.
Cabinetry has its own set of trade offs:
- Solid wood: rich grain, ages beautifully, sensitive to humidity swings
- Veneer: convincing wood look at a lower cost, less forgiving of deep scratches
- Lacquered finishes: sleek and easy to wipe clean, but fingerprints and smudges show more readily
A well-built island also has to hide its plumbing runs for a sink, electrics for powered drawers or a warming appliance, and often a dedicated ventilation solution for an island hob, since ducting has to travel further than it would along a wall. Heavier stone tops usually need reinforced cabinet framing underneath, something worth raising with your designer before you fall in love with a 40mm slab.
Pro Tip: Ask to see a physical material sample under your own kitchen lighting, not showroom lighting. Warm and cool color temperatures change how a stone or lacquer finish reads dramatically.
What Do Real Custom Island Projects Look Like?
Seeing finished work tells you more than any spec sheet. A few project types come up again and again with Zürich clients.
- The entertaining island: built wide enough for six barstools, with a raised bar section that hides prep mess from guests seated on the other side.
- The compact two-person workflow island: designed for households that cook together daily, with two separate work zones instead of one shared counter.
- The island-as-dining-table: an extended waterfall countertop that replaces a separate dining table entirely, a layout choice that works particularly well in open-plan living spaces where preserving sightlines matters.
When you look through a portfolio, pay attention to the small things: how a stone joint is finished, whether cabinetry meets flooring cleanly, and how an integrated hob or sink sits flush without visible seams. Those details separate genuinely bespoke work from a kit that’s been dressed up.
A well-designed island should disappear into how you actually live in the room, not announce itself as the expensive centerpiece. The best compliment a client can give is that it feels like it was always meant to be there.
Furniture and lighting sourced from partner ateliers like Object Carpet, De Sede, and Oluce often finish these spaces, adding texture and warmth that pure cabinetry can’t provide alone.
How Much Does a Custom Kitchen Island Cost and Take?
Budget planning starts with understanding what drives the number, not just anchoring on a single figure. A standalone bespoke island typically sits at a different price point than an island built as part of a full custom kitchen, since a full renovation shares design and installation costs across a larger scope.
- Design phase: briefing through approved technical drawings
- Manufacturing: cabinetry and worktop production, often the longest single stage
- Installation: on-site fitting, trade coordination, and final commissioning
Costs move up or down based on choices that seem small at the sketching stage. Adding an undermount sink, pop-up power sockets, or a dedicated hob ventilation system each pushes a project into a higher price band, since each requires its own plumbing or electrical run. Disposal of an old kitchen, appliance installation fees, and temporary relocation while work is underway are frequently overlooked in early budgeting conversations, and they deserve a line item from day one rather than a surprise at invoicing.
Pro Tip: Ask your designer for a cost breakdown by phase, not just a single total. It makes it far easier to spot where a material upgrade is actually worth the money.
How Do You Choose the Right Kitchen Designer in Zürich?
The gap between a good designer and a disappointing one usually shows up in the details nobody thinks to ask about until it’s too late.
Start with process questions: Who manages the electrician and plumber on-site? What happens if a material is discontinued mid-project? Is there a written guarantee on workmanship? A firm that hesitates on any of these hasn’t managed enough projects to have clear answers ready.
- Review portfolios for projects at a similar scale and finish level to yours, not just the flagship photos
- Read client testimonials looking specifically for comments on communication and timeline accuracy
- Confirm full project management is included, not just design consulting
- Ask whether cabinetry is built in-house or through vetted local workshops
Red flags worth walking away from: no technical drawings before production starts, vague handover terms, or a portfolio with no local installation experience. Custom kitchen design done well changes daily life, but only when the team behind it can actually deliver what the renders promised.
Pro Tip: Ask to speak briefly with a past client, not just read a written review. A five-minute call reveals far more about how a firm handles hiccups mid-project.
What Should You Prepare Before Your First Meeting?
A little preparation turns a vague first conversation into a proposal you can actually act on.
- Sketch a rough floor plan and take current photos of the kitchen and adjoining rooms.
- Note approximate ceiling heights and any planned new appliances.
- Write down your top three priorities, whether that’s entertaining space, storage, or a specific cooking style.
- Bring two or three inspiration images or physical material samples that capture your style.
- Set a realistic, if broad, budget range before the meeting starts.
Upscale Interiors’ style quiz is a quick way to clarify your aesthetic before a consultation, and remote or in-home measurement options mean you don’t need a finished plan to get started.
A Designer’s View on Planning an Island
When I plan an island, workflow comes before aesthetics. Proportion and material longevity follow close behind. Upscale Interiors’ in-house coordination means one team stays accountable from first sketch to final installation, which is what actually keeps a project on track.
Ready to Start Your Custom Island Project?
Upscale Interiors is the alternative to juggling a separate designer, joiner, and installer for your Zürich kitchen: one team handles in-home measurement, bespoke island design, 3D visualizations, and procurement from partner brands like Ethnicraft, Lema, and Novamobili, then stays on through full project management and installation.
A consultation typically starts with a conversation about your space, your priorities, and your budget, followed by a proposal built around what you actually described, not a generic package. Zürich clients get local coverage, photographic case studies from completed projects, and aftercare once the install is finished.
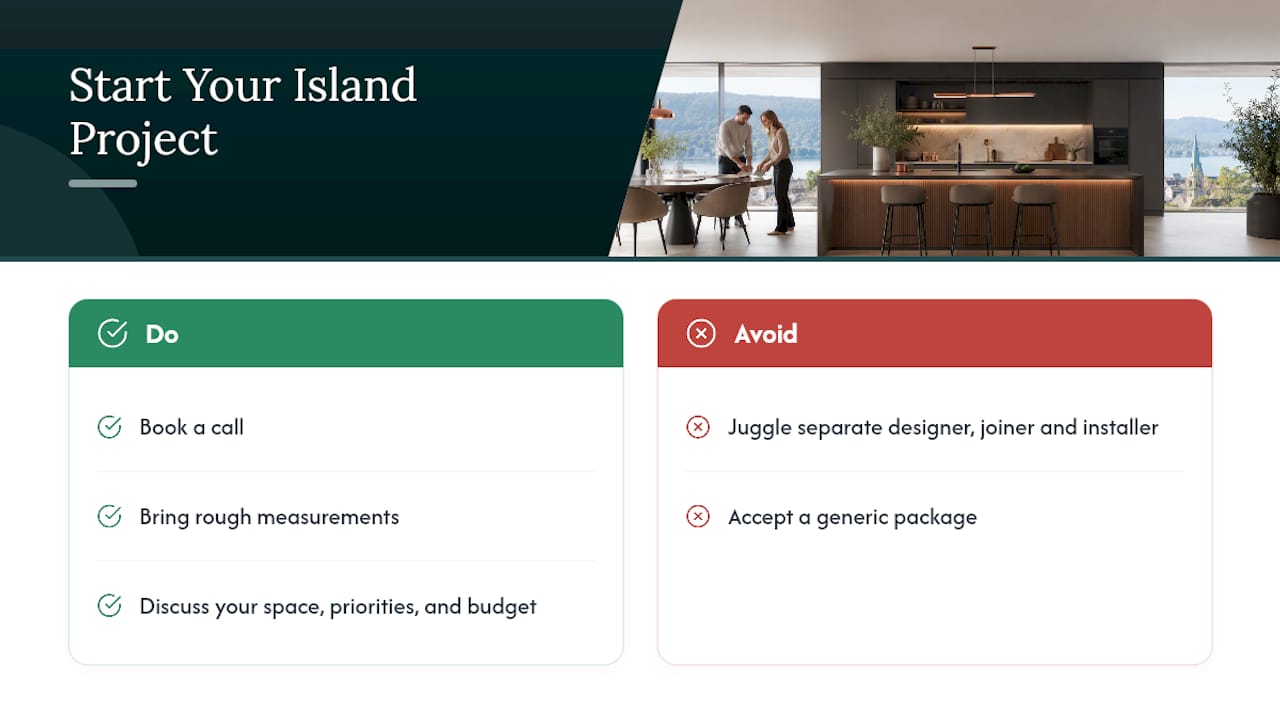
If you’re ready to see what a made-to-measure island could look like in your own kitchen, book a call and bring your rough measurements. That’s genuinely all it takes to get started.
Sources
- Open Plan Living Designs: 9 Real Examples for 2026
For structural changes affecting load-bearing walls, consult a licensed local architect or your building authority before finalizing plans.
Recommended
- Interior Design In Switzerland Category | Upscale Interiors
- Kategorie Interior Design in der Schweiz | Upscale Interiors
- Interior Design Zurich | Swiss Interior Designers – Upscale